Announcement

Collapse
No announcement yet.

You guys might like my new truck engine

Collapse
X
 
  • Filter
  • Time
  • Show
Clear All
new posts

  • #16
    I had to order a different USB->TTL converter because the first one I ordered was a brand that won't talk to the GM ECUs, so while I wait on that to show up, I worked on the intake manifold some more. Technically, at this point there is no reason why this intake won't work on ANY 3500 or big-port 3400, as the lower intake doesn't need to be modified at all.

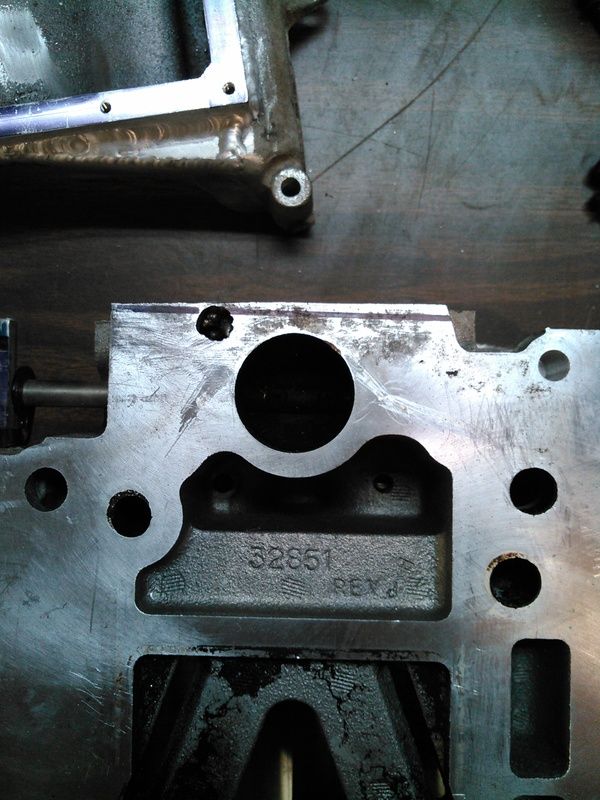
    First thing to do is get it cleaned up a bit and start measuring how far off I was with the angle grinder.
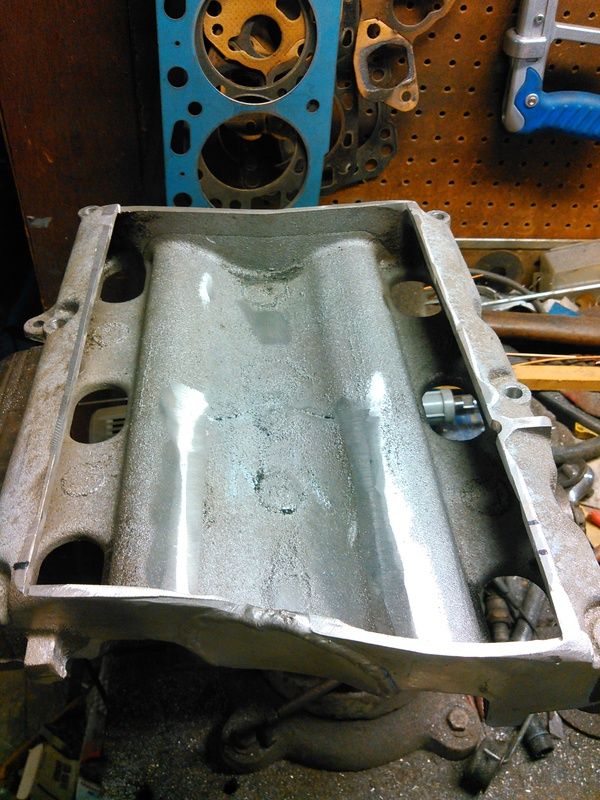


    It was +/- 40 thou, spent thirty minutes with a file and got it to this point:
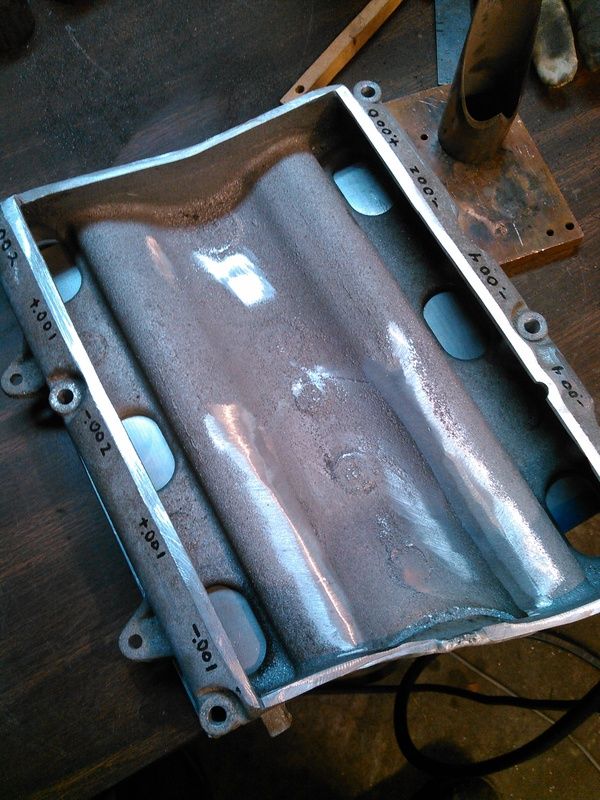


    Then I welded up this frame, it's 0.750" tall and 0.500" thick bar, and it actually came out pretty square. A little clean-up on the welding and it was ready to be welded to the top of the intake casting.
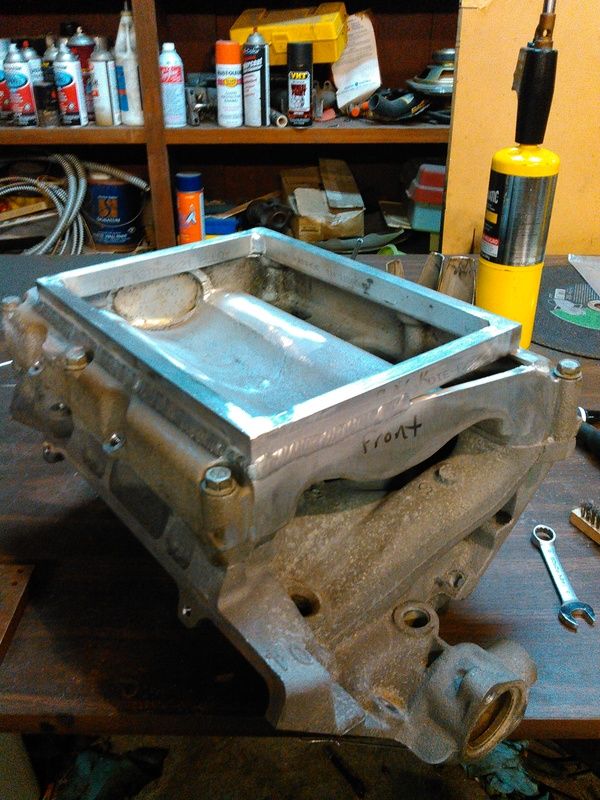


    Yes, I did fuck up. The sharp-eyed ones of you will notice that the intake says "front" and the frame says "back". No, it doesn't matter.

    The small hole in front was easily filled in, didn't take any photos. The bigger hole in the back I did take some photos of.
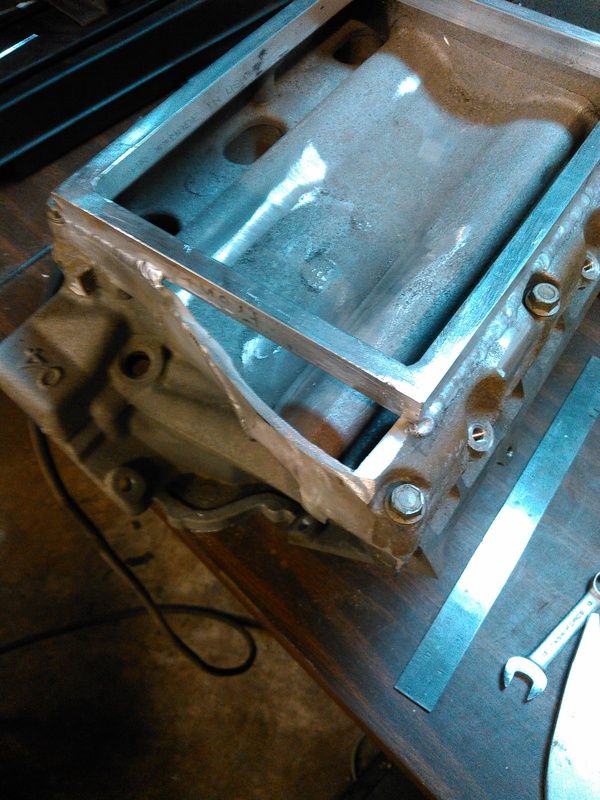


    I used some 0.213" thick plate that was in the big stack from page 1, it's thicker than the casting but I didn't have anymore of the 0.127" plate I used on the front. It'll be fine.
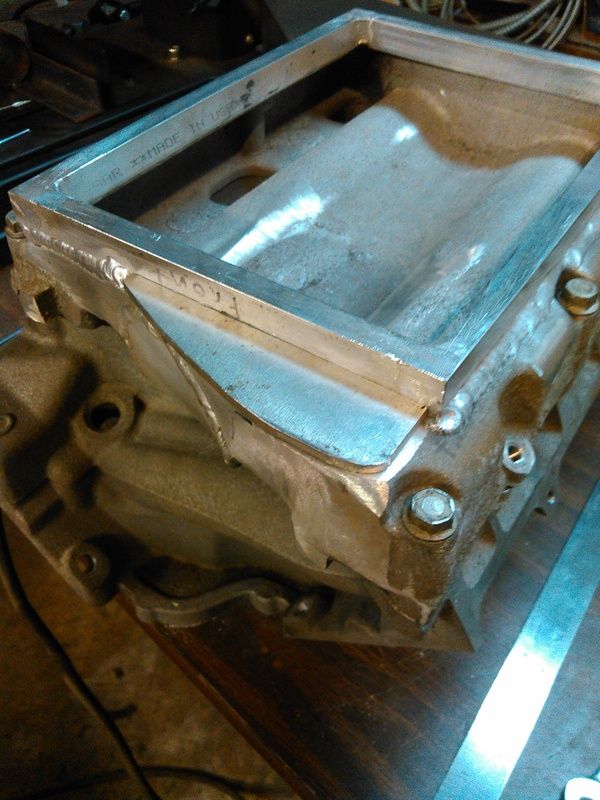


    When I'm not welding on shitty castings, I can go OK with the TIG with a little rum in me. None of that white rum shit, though.
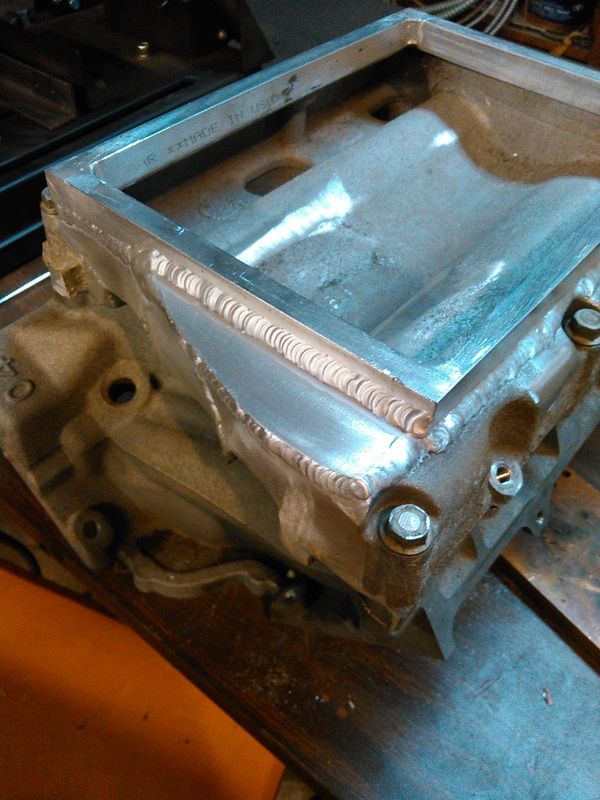


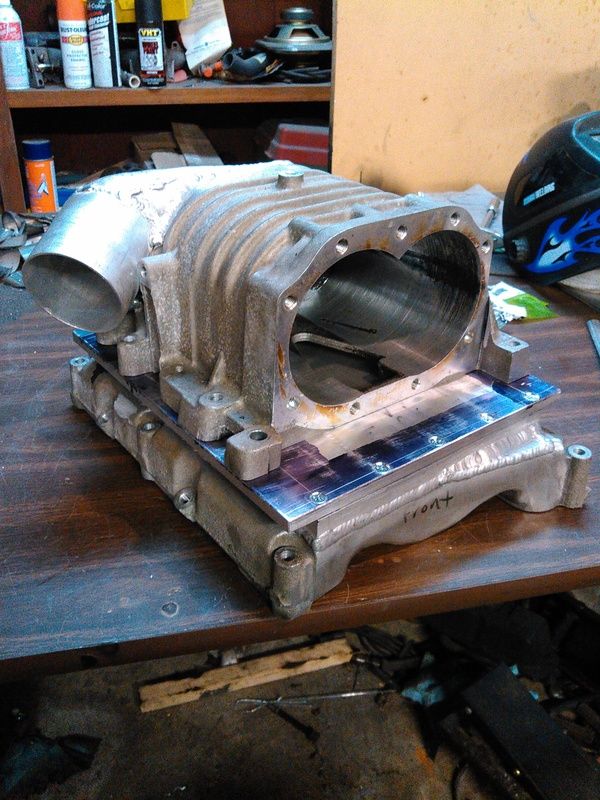
    Now that the frame is welded on, I unbolted it from the lower intake manifold and measured how far it sprung during welding. The total out-of-flat was decent, pulled 0.013" total. That's totally workable, I'm gonna run it over to a buddy with a milling machine and have him skim it flat. Yeah, I *could* do it in the shop but the machined face on the bottom is slightly higher than the lowest part of the intake, so I'd have to find two slabs of plate that are parallel and flat, fit them both on the surface plate, and lap the intake against the plates...just more trouble than it's worth. Once the intake is flat and parallel then I'll start drilling and tapping the 20-something holes in the frame on top, that the supercharger plate will be bolted to. Once the plate is bolted down, I'll have to get the heads on the block and the lower intake manifold fitted, and get all the accessory drive bolted up, so I can get the supercharger drive pulley aligned and square. Once that's done and the super is fitted to the top plate, I can start on the headers.

    There's no exterior differences between the 3.4L aluminum-headed hybrid I'm building, and the 2.8L iron-headed boatanchor in the truck, aside from the accessory drive. Originally, when the 3.4L engine still had iron heads on it, the exhaust manifolds were identical. I've dummied up the headers in PVC on the truck, so I'm pretty sure I won't have to clearance the truck with the BFH later when I go to bolt the new engine into place. If I have to apply the BFH, well, then I have to apply the BFH.

    Comment


    • #17
      Where did you measure the MSCA? I came up with it being where the guide protruded in the port, and your modification cut that down significantly.
      Ben
      60DegreeV6.com
      WOT-Tech.com

      Comment


      • #18
        I measured it actually in the intake just above the port opening, which did not change. The guide boss was slightly smaller MCSA, but the valve guide area varied significantly between all six ports. My set of castings were pretty wonky, I was surprised since all the new GM castings I've worked on have been nice. The majority of the port work is in the valve guide area, that's where I found the biggest flow gains and so I went with them. The short side turn is way touchy on these, a little bit went a long way, and was the hardest part to get to "match" between the ports. Second biggest issue so far is the intake-Best I have done with the intake bolted up was ~214CFM at 0.500" lift. Exhaust ports are proving to be a real bear-I've gained less than 8%. They still move enough to satisfy me, so I best quit complaining and just run it.

        I am wondering how the intercooler core is going to affect port-to-port flow, but I won't be able to really test that until I get the plenum milled. And I need to figure out water connections-I don't want to run rubber/plastic hoses in the intake due to fuel degrading them over time. O-ring fittings would be the nicest way. I may settle for teflon hose but it's so hard to get it to stay on a hose barb that it seems too much of a risk, too. So far, polyurethane seems to be the best bet for that application, but I am not sure how soft it would get with the sustained intake temps at 160-180F. Nylon tube may work as well, not sure yet.

        Comment


        • #19
          What about just using some (metal) hard line, with flare or inverted flare fittings to be inside the intake.

          Comment


          • #20
            Getting the fittings in there will be tough-that's pretty much the only reason. Right now I'm looking at 1/2" steel hardline with inverted flare fittings, and the minimum bend radiuses are going to be violated in a bad way.

            The other issue is getting the hardline through the intake wall, there isn't a flat spot big enough for two bulkhead fittings unless I go in the "tunnel" area, which is going to have some flow balance implications. When I get the intake back tonight I'll mock up a few things and see what I can make happen.

            Comment


            • #21
              Finally got the cam ordered. Has taken a long while!

              Crane Cams has the SFI flat-tappet shaft, I had a little talk with the guys there and we settled on a 266* intake, 278* exhaust, 0.469" intake lift and 0.498" exhaust lift. Decided a 114* LSA will keep the usable revs down where they belong in the truck and will help out with running more boost later on while still keeping the 9.0:1 compression ratio.

              Comment


              • #22
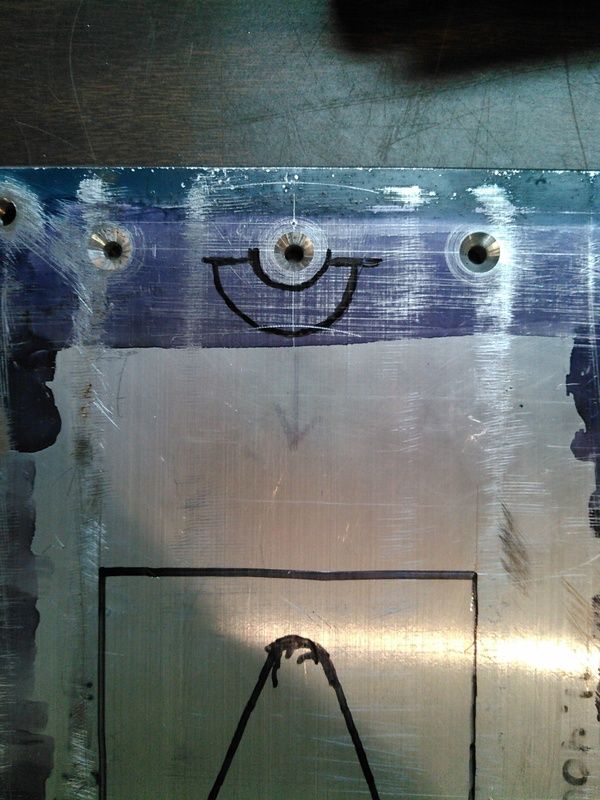
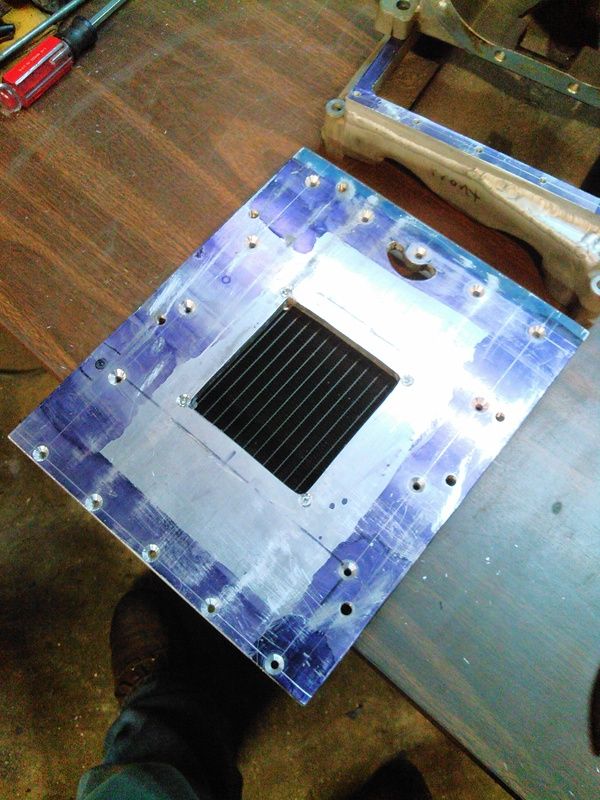
                Got the upper intake manifold and supercharger mounting plate drilled, tapped, and countersunk today for the supercharger mounting plate. I may start assembling the engine next week, and just use the camaro oil pan to keep the sump covered and clean until I can buy another S10 oil pan.


                Just need the oil pan and to make new pushrods, and that'll have the engine assembled all the way up to the lower intake manifold. That's the stage I need to get to in order to set the belt drive up and the super positioned properly on the manifold. Until I have the supercharger position nailed down, I can't machine for the intercooler core.

                Of course I could just dummy everything up...which is the right way to do this.

                Comment


                • #23
                  Looking good

                  Sent from my XT1080 using Tapatalk
                  '86 Grand National

                  Comment


                  • #24
                    Forgot to do the rocker arm thing today. I'll get around to it...

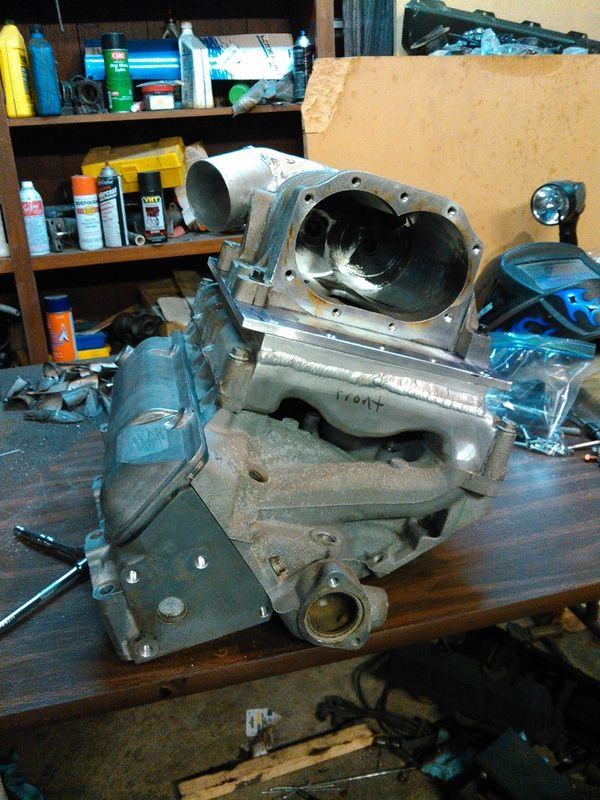
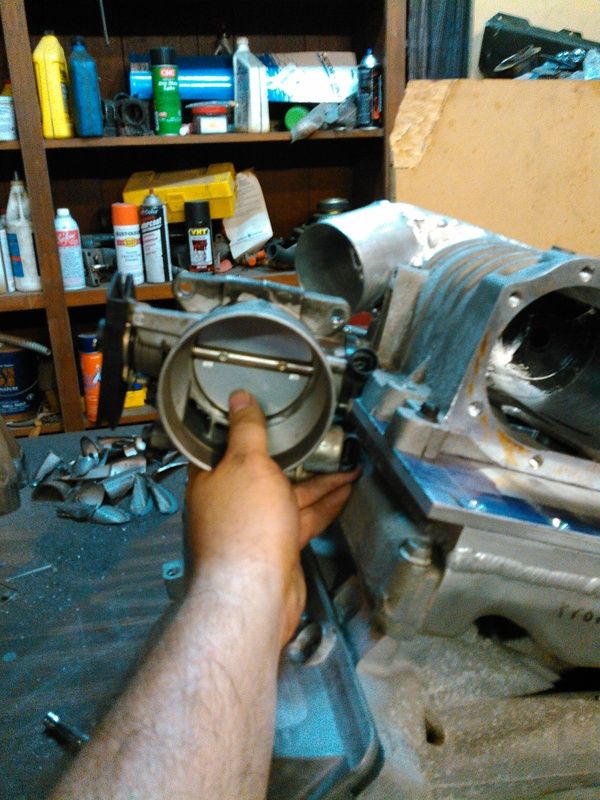
                    I did assemble the Tower Of Power today, needed to figure out what to get to make the throttle body fit where it belongs. This may be a wide flat cowl hood when I finally get it on there...

                    Gonna have to address this problem...


                    It's possible I'll need to add a little metal to the back of the base plate, but more likely I will need to add a bolt boss to the supercharger case. It's doable.

                    And this is why. The bypass valve pretty much straddles this screw, there's plenty open area there to flow air through but I'll have to bevel and radius the opening to make airflow smooth, to keep bypass noise down. I didn't do this on the datsun and the bypass valve is FUCKING LOUD.


                    I did get the intercooler core mounted, just gotta work out the tubing inside the intake manifold. May get interesting.


                    The Tower, minus the cylinder head I didn't need. I may bolt it up tomarrow to level things out, but for what I needed, it was just more bolts.


                    And this is where I want the throttle body to sit, If I can get it here then I will have absolutely no problem removing the valve cover without unbolting the supercharger. Will take a 135 or 180* 3" aluminum bend, Or I could be a cheap bastard and pie-cut it.


                    If I were to pie-cut it it would be hours of grinding and sanding inside the bend to get it smooth, so it may be worth it just to get an aluminum bend when I order more exhaust parts.

                    Comment


                    • #25
                      As I sit here looking at those photos, I am asking myself if those intake manifolds need to be coated. I'm thinking thermal barrier coating on the bottom of the lower intake, and high thermal dispersion coating (....flat black) on the upper intake and the exposed side of the lower intake.

                      I've done coatings before, but I'd want to find a good bake-out oven to degrease these parts with. Even have a long soak in hot degreaser they still oozed oil when welded on.

                      Comment


                      • #26
                        The shortblock is all but assembled, waiting on the cam to show up and a new crankshaft key. Once I have those two items then everything from the heads down can be assembled.

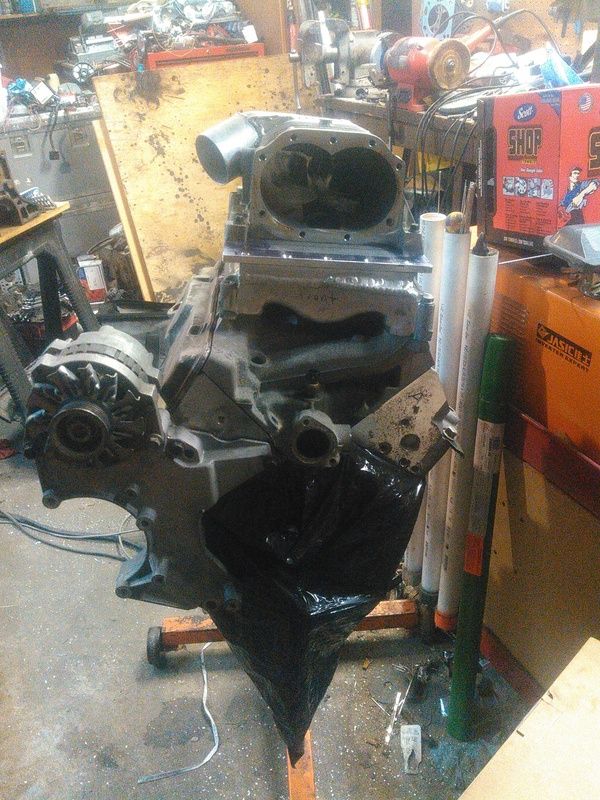
                        In the meantime, the bottom end is in a bag, the heads are bolted on straight through the bag in the photos below. I am checking clearances and have been working on the throttle body inlet tube.

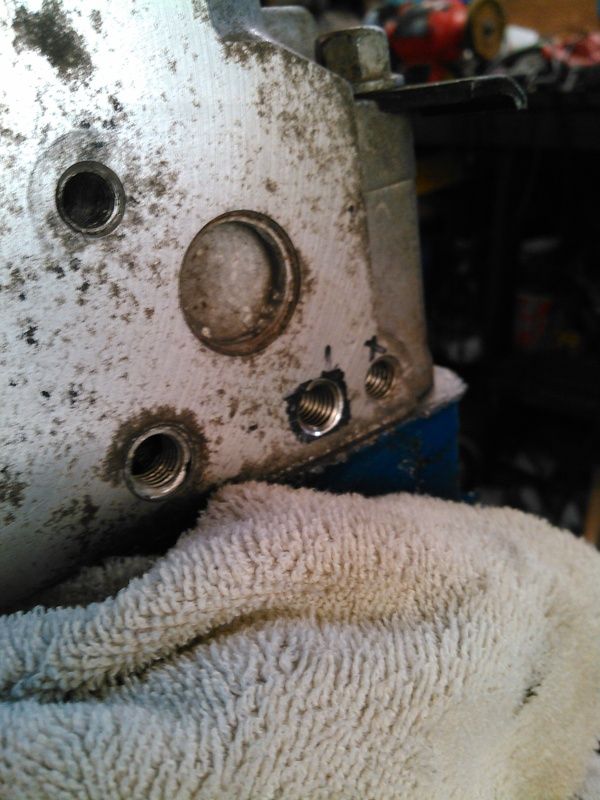
                        This is the new threaded hole in the head for the power steering bracket-it's level with the old hole but moves over about 15mm.


                        It's not blind though, so thread sealant is required here. I will probably just bond in a stud.

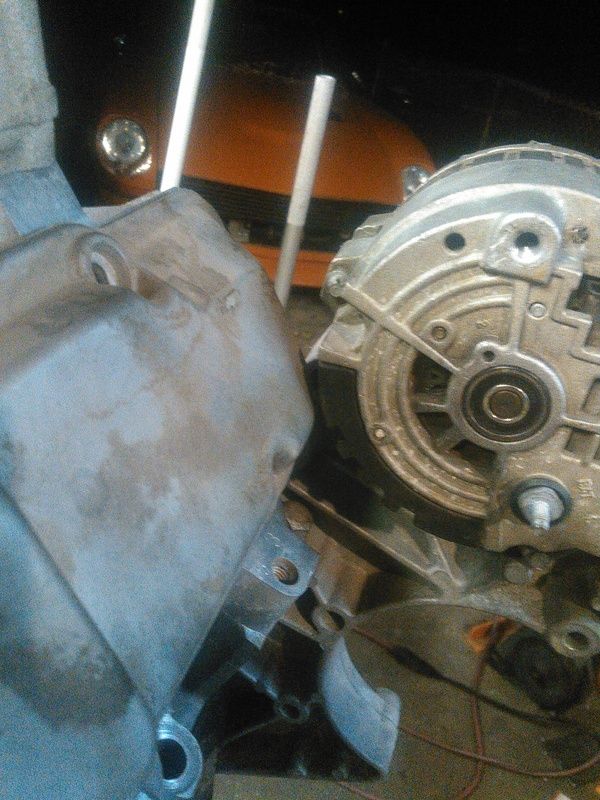
                        The camaro alternator mount already has a blind hole in it that just needs to be drilled through, and it'll bolt up to the GenIII/IV cylinder heads. I'm lucky I had a set of GenII valve covers, because the alternator-to-valve cover clearance is TIGHT.


                        Really, really tight. May need some additional clearancing later when all the gaskets get fitted up. Only about 5mm there now, and I'll loose 2mm total when all the gaskets go on.

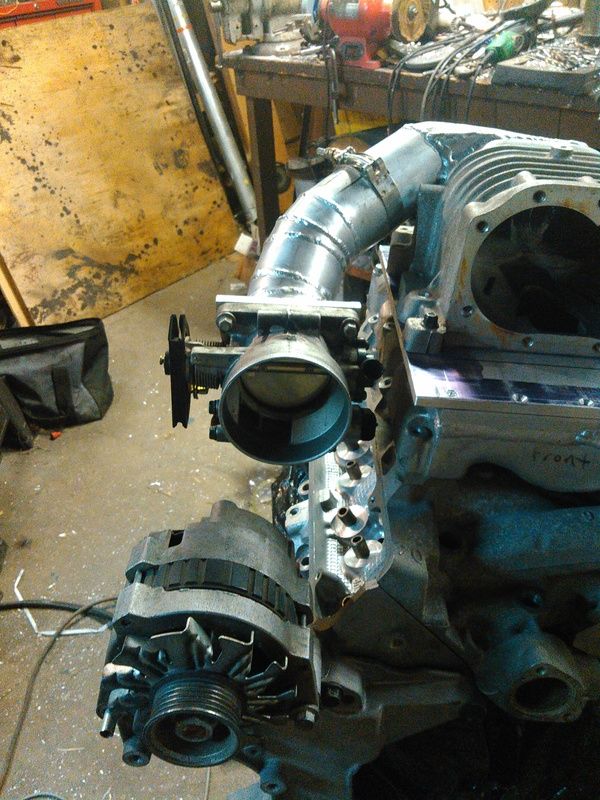
                        Here's the intake mocked up on the heads, I am trying to work out where I want the throttle body to sit in this photo. I've got that nailed down, but it will take some work to get the pipe snaked in the way I want. It's going to take a lot of cuts no matter what, so I chose not to cut up the 3" aluminum bend I bought for this and I'll just lobsterback it.


                        I am almost done with the cylinder heads, then I can bolt them down on the block with the headgaskets this time.

                        Comment


                        • #27
                          Got a little time to do some work the other day.

                          Learned that deciding to work on the car after putting in a 14 hour workday is just not a great plan.

                          Started welding up the intake tube-the tubing I cut up was only 1.2mm or so in wall thickness, I got scared of burn thru so welds aren't as nice as they could be. Meh, I can't see it with the hood closed, even with the big-ass cowl it's gonna need.


                          As you can see I did get it moved down and in the last little bit, it's in the right spot now.


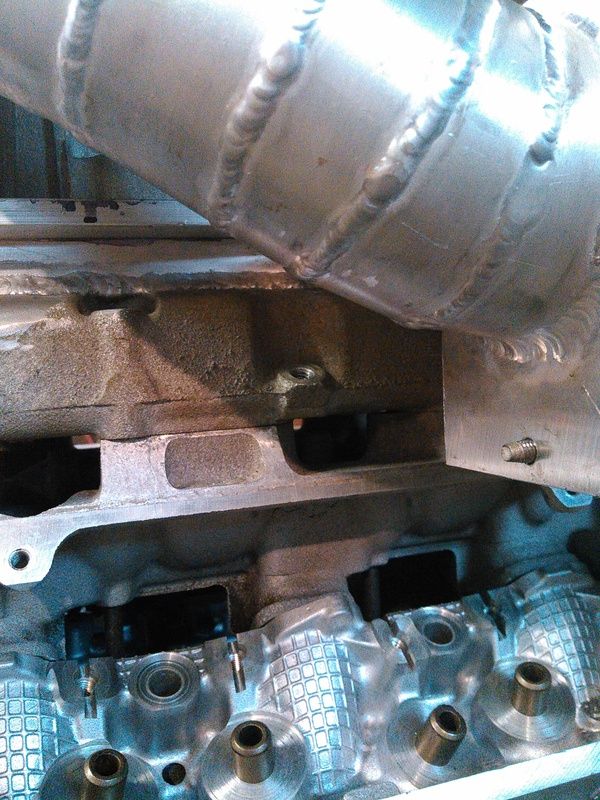
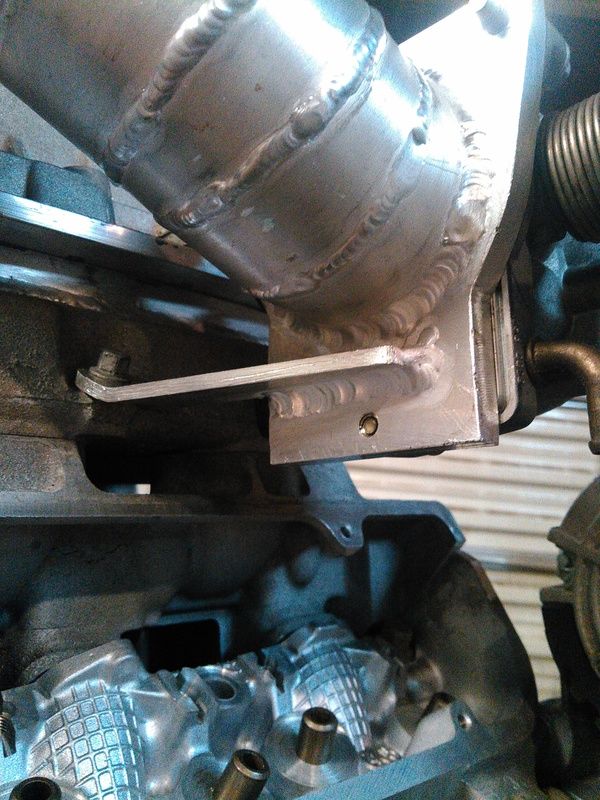
                          This, this is the bolt boss that used to hold the coil pack in place. I've chosen it as the new bracing point.


                          About right here is where I realized that not only is the throttle body mounting plate that I cut out two weeks ago not symmetrical, but that I have welded it to the intake tube wrong-way around. Too late now. The section uncovered isn't critical anyway, it's a section of the throttle I'm not using and it's totally sealed off. Still sore over it.


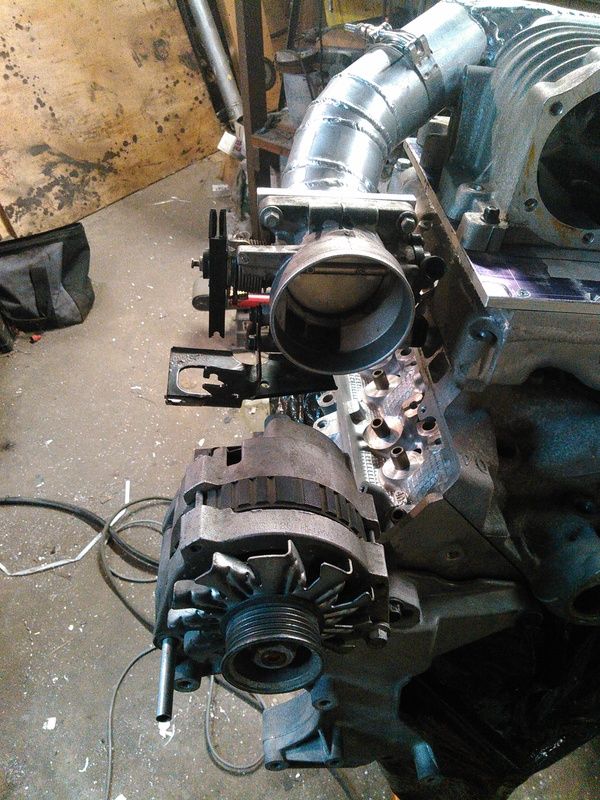
                          Here's the original northstar throttle bracket, bolted up. With the unmodified bracket, cruise control would be possible...but I modded the bracket due to the throttle cable being too close to the alternator plug for my liking. I can always pick up another bracket and mod it to use the cruise if I wanted too. My truck doesn't even have it fitted...but I might buy one later that does.

                          Yes, my phone camera sometimes is actually a potato. Sorry.

                          The T-bolt clamp above will get replaced with a proper flange at some point. The heads come off for the final scrub-up and valve check, then assembly and everything except the rocker arms and pushrods will get fitted and bolted up to the block, so I can get the engine sealed up properly.

                          Comment


                          • #28
                            Have been working out of town the last month, but have gotten a few things going the right direction now. Found a few places to buy Delphi connector parts, including the pins, back shells, and colored covers for the ECU connectors. I was thinking of using the camaro forward harness assembly I have but there is a LOT of it that would be wrong/too long/too short, so I am going to split it and make an "engine" harness, "engine bay" harness, a "transmission" harness, and a "body" harness.

                            The trans harness will be for the manual, but the EFI harness that it plugs into would have all the auto trans stuff populated. This way if I keep breaking T5's I can just plug in the 4l75e I have sitting in my floor. I haven't converted the bellhousing yet, I am still thinking about that.

                            Did the 4l60e's with removable bells ever come behind the V660? I haven't seen one yet.

                            Sent from my KYOCERA-E6560 using Tapatalk

                            Comment


                            • #29
                              I don't know if that is a year-dependent change or not, but 3800 f-bodies from 95-02 would have the same bellhousing pattern if that opens up options.
                              1995 Monte Carlo LS 3100, 4T60E...for now, future plans include driving it until the wheels fall off!
                              Latest nAst1 files here!
                              Need a wiring diagram for any GM car or truck from 82-06(and 07-08 cars)? PM me!

                              Comment


                              • #30
                                Seems like the 2.2 S10 would have a 60 degree pattern too, but the starter pocket is on the wrong side. Is this right?

                                Sent from my KYOCERA-E6560 using Tapatalk

                                Comment

                                Working...
                                X