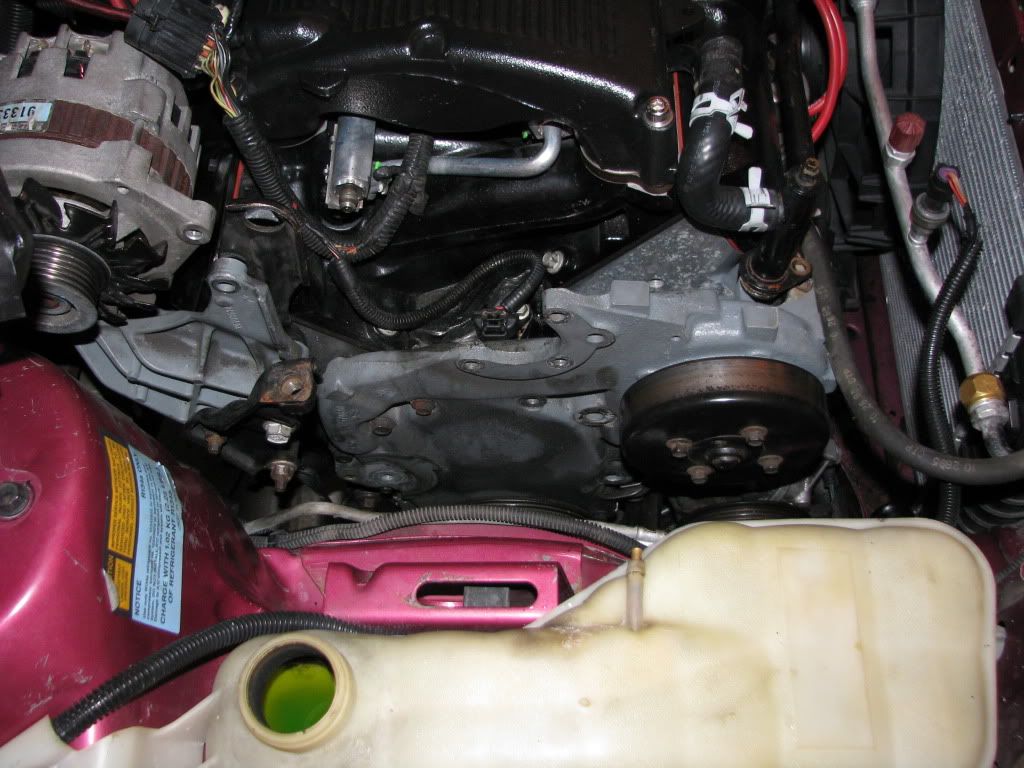
If by dizzy you mean distributor, then this car has ignition coil packs, no mechanical distributor.
Announcement
Collapse
No announcement yet.
96 Corsica 3.1, probable ring failure
Collapse
X
-
I really can't figure out how to tell if a gasket is "metal" or not. There are only a few gaskets that mention it.
I'm going to go with the bi-metal Mogul bearings, the -0.026mm version if there is enough wear (I assume that is what those bearings are for). Measure wear initially with a micrometer and then check with plasti-gage.
Worn out pistons seems to be a much rarer problem than worn piston rings, How likely is it that my pistons have worn grooves?
Comment
-
Test run shopping list to learn my way around RockAuto. Intake manifold gasket will come from Amazon. I doubt I should get oversized rings unless I find the cylinders are badly scored or out of round, but since the blow-by was pretty minor I doubt they are in that bad shape. So hopefully I can just score the cylinders a bit and the standard rings will be fine?
Comment
-
Had to wait a day for the fuel line disconnect tool. Here are some pictures.
According to this the camshaft doesn't seem to look too bad. What do you think?
It's probably a good idea to choose a specific oil for this engine and maybe go up a weight grade.
Coolant passage looks very clean, oddly enough. If the head gasket failed, it failed between the cylinders without failing at the fluid passages.
Comment
-
The engine is filled with what looks like pieces of old gaskets and grommets, and gritty stuff in general.
One of the pushrods appears to have been replaced, oddly enough. The rest of the pushrods show an obvious smooth wear pattern around the oil hole.
None of the brackets around the pulleys will come off because there's not enough clearance to remove the bolts. Not unless I take a hole saw and make swiss cheese with the wheel well. It looks like I can still take the heads off without removing the brackets though. I can't take the bracket off the engine so I have to take the engine off the bracket!Last edited by keantoken; 12-17-2015, 09:40 PM.
Comment
-
On this engine the dipstick tube has a bracket that next to one of the head bolts. The bracket prevents the heads and exhaust manifold from coming off in one piece as seen on youtube... The bracket broke off, so problem solved. It left 4 neat small holes in the tube, which will be easy to seal with silicone tape. Then I'll wire it back to the bracket.
I'm lucky I was able to get the heads off with the exhaust manifold because I rounded over one of the heat shield bolts. I might not even try removing the manifold because dealing with exhaust bolts is not something I'm prepared for. Hopefully the smoke I saw rising from it was stuff burning off or came from somewhere else.
There was frost on the car when I stopped for the day. I mopped up the coolant out of the cylinders, sprayed everything good with more WD40, then wiped it down with motor oil.
Here are the pictures. Please advise on the gunk level, cylinder wear, and what you would do to prepare everything. I didn't notice any evidence of valve problems while I was troubleshooting it. The cylinders are polished, with some faint vertical streaks and what appear to be scuff marks.
Rear cylinders.
Valves. You can see the decals from the last head gasket are still in good condition, but on the head rather than the gasket.
Comment
-
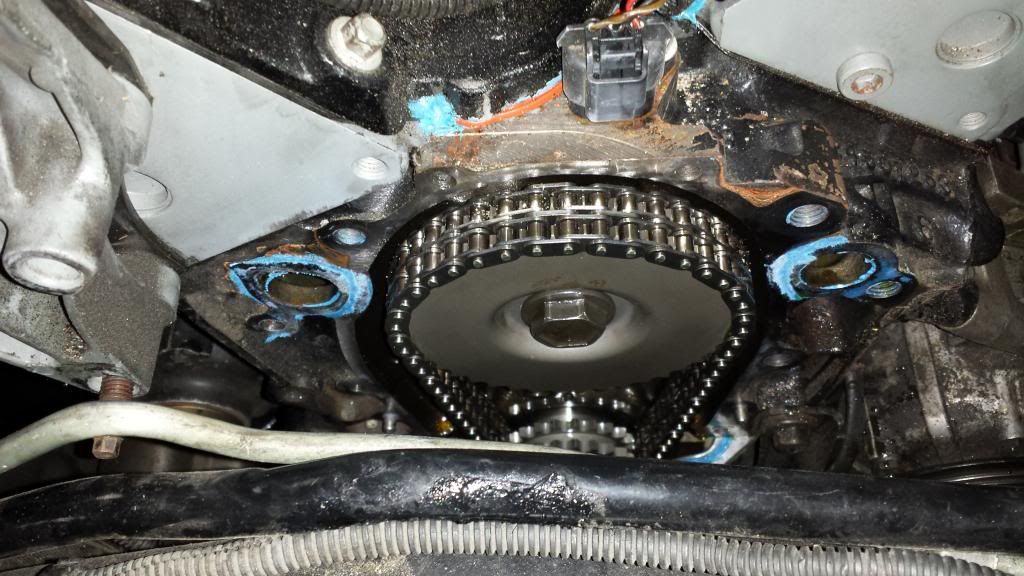
You can remove all the bolts associated with the side motor mount and timing cover. Trust me I've pulled the timing cover twice with the motor in the car and I have a L-Body Beretta just like your Corsica.
First time...

Second time...

I hope you're also ready for having to remove at least the right side subframe so you can pull the pan. You won't be able to get it off with that still on the car.Last edited by 3400-95-Modified; 12-19-2015, 10:50 PM.
Got Lope?
3500 Build, Comp XFI Cam 218/230 .050 dur .570/.568 lift 113LSA
Fully Balanced, Ported, 3 Angle Valve Job, 65mm TCE TB, S&S Headers.
Stage-1 Raybestos/Alto 4t60e-HD, EP LSD, 3.69FDR
12.61@105 Epping NH Oct 2015 Nitrous 100shot (melted plugs) 13.58@98.8 N/A 3200LBS
Comment
-
Great, I still have no idea how to do it though. Some instructions may help keep me from dropping an engine on myself. Do you have a link to a service manual for this car maybe?
Any idea what would be the signs of a timing chain problem on this car? For all I know that may be a problem I have as well.
PS. There is a broken off pipe on your coolant reservoir?
Comment
-
I do appreciate your help., FWIW.
I found some instructions here:
 remove or disconnect Negitive battery terminal serpentine belt and loosen , dont not remove upper ac compressor bolts raise vehicle and support drain crankcase right front wheel assembly and splash shields engine mount strut from suspension support right front abs wheel speed sensor harness from the right suspension support right front ball joint and stabilizer link right side suspension support remove lower ac compressor bolts, position compressor aside and support engine mount strut bracket and engine to transaxle brace oil filter and starter flywheel/flexplate inspection cover oil pan retaining bolts and oil pan Clean- Oil pan flanges, oil pan rail, front cover, rear main bearing cap, threaded holes install or connect new gasket, oil pan, and bolts, tighten to retaining bolts- 18 ft lbs oil pan side bolts 37 ft lbs then reverse disassembly.
Unfortunately I don't know what most of that stuff is, but I'm sure I'll figure it out. I'm guessing I can't do this with the right wheel still on the ground.
Comment
-
No, the car will have to be on stands at least that side as well as you will have to unbolt the sway bar from the subframe if you are planning on only pulling one side. Depending on your rust situation that could be difficult to near impossible to save those sway bar hold down brackets. And my coolant tank has one port removed because I removed the pipe that crosses the front valve cover and goes to the intake coolant neck. I just put an air bleeder there instead to clean up the bay some.
I've only used a Haynes manual years ago but since then all of my repairs I do without a manual... I know these cars like the back of my hand.Last edited by 3400-95-Modified; 12-21-2015, 07:21 AM.
Got Lope?
3500 Build, Comp XFI Cam 218/230 .050 dur .570/.568 lift 113LSA
Fully Balanced, Ported, 3 Angle Valve Job, 65mm TCE TB, S&S Headers.
Stage-1 Raybestos/Alto 4t60e-HD, EP LSD, 3.69FDR
12.61@105 Epping NH Oct 2015 Nitrous 100shot (melted plugs) 13.58@98.8 N/A 3200LBS
Comment
-
The 13mm side bolt heads are only half the thickness of a normal bolt, and really want to round over. I managed to get a few off, but there is still one between the oilpan and transmission fluid pan that seems inaccessible. I don't know what to do about these bolts because I'm putting all my effort into the breaker bar and either they do nothing or they round over.
Comment
-
I cracked a 13mm socket on one of the transmission to engine bracket bolts. Found a 1/2" impact socket that fit the 13mm bolts much better, which helped with getting more torque without stripping. It's silly that actual 13mm sockets don't fit that well.
Since I'll have to reuse the crankshaft is there anything I should do to it besides inspection and cleaning?
Also, I can turn the crankshaft by hand and it makes burbling sound, even though I drained all the oil out. Could this be coolant leaking into the timing cover?Last edited by keantoken; 12-23-2015, 03:34 AM.
Comment


Comment