Announcement

Collapse
No announcement yet.

'94 3.1L Lower Intake Manifold Gasket Replacement

Collapse
X
 
  • Filter
  • Time
  • Show
Clear All
new posts

  • Question : '94 3.1L Lower Intake Manifold Gasket Replacement

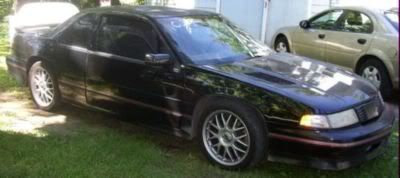
    This is a 1994 Buick Century, 3.1L V6 VIN M. When I first got the car, the coolant overflow tank seemed to have a high quantity of oil in it. The thermostat was either intermittent or stuck, because the car would bounce between fan cycles pretty quickly.

    That was replaced, and the coolant system was flushed. Over the past few days, I have noticed that I'm losing coolant very quickly, and the oil in the rocker cover is very thin, and dead black. I also noticed that the car's running a bit rougher than before, I lost almost all engine power, as I would WOT the car to get to highway speeds and I had no acceleration at all, and the lack of power was also apparent from idle.

    I started noticing an oil leak in my driveway as well. I am currently working on replacing the Lower Intake Manifold, hoping that the issue lies there and not further inside of the engine. The engine has overheated before from abuse, but there were no issues that had arisen at that time.

    I am currently having a problem getting the Lower Intake Manifold off, though. According to all books and Mitchell OnDemand, the Power Steering Pump should just pull right out after being unbolted. However, the reservoir contacts the LIM when being lifted, and therefore cannot be pulled out to access the last manifold bolt. I need suggestions on how to go about getting this PITA moving again.

    I rented a PS Pump Pulley kit, as I had originally thought maybe the extra movement with the pulley being removed would give me the angle required to remove the pump. However, after further review, it appears that this may end up causing more harm than good. Does anyone have any ideas? Any help is greatly appreciated!

  • #2
    Normally I rotate it backward, or lines side down to wiggle it out. I never pull the pulley off and I normally don't unhook the lines either (more to hook up on reassembly and bigger mess to clean up).
    -60v6's 2nd Jon M.
    91 Black Lumina Z34-5 speed
    92 Black Lumina Z34 5 speed (getting there, slowly... follow the progress here)
    94 Red Ford Ranger 2WD-5 speed
    Originally posted by Jay Leno
    Tires are cheap clutches...

    Comment


    • #3
      Thanks for the input! I'll give that a shot again when I get back on it tomorrow. If I cannot get it out that way, are there any other suggestions? I heard that removing the water pump and bracket may give me clearance, but I know that doing so will make things just that much more complicated.

      Comment


      • #4
        It is a pain, but it will wiggle out of there. I think I've had to gently pry it out a few times before as well.
        -Brad-
        89 Mustang : Future 60V6 Power
        sigpic
        Follow the build -> http://www.3x00swap.com/index.php?page=mustang-blog

        Comment


        • #5
          Thanks for the help! I had never heard anyone mentioning they had issues with it before, so I decided to get feedback before I broke anything. Thanks, hopefully I can get it done today! Now as a follow-up question....a mechanic I talked to said GM developed some sort of Bars Leak-style coolant additive that prevents the problem from arising again. Is there any idea what this is? And since we're on the same subject, should I put any additives in the coolant/oil after the job is done?

          Comment


          • #6
            Personally I would just flush the cooling system and change the oil. I've heard about the bars leak style stuff and have been told that GM pops a few pellets in cars from the factory to seal them up before they leave. You could check with a dealership to see if they would sell you some. I wouldn't use any more than they tell you thought. I've seen too many people use a full bottle of Bars stop leak to seal a small radiator leak and then have their heat go out after the stuff clogs their heater core... Personally I won't touch the stuff, but if I had to, I would use the stuff GM uses, but no more then recommended. I like having heat up here in Indiana this time of year.
            -60v6's 2nd Jon M.
            91 Black Lumina Z34-5 speed
            92 Black Lumina Z34 5 speed (getting there, slowly... follow the progress here)
            94 Red Ford Ranger 2WD-5 speed
            Originally posted by Jay Leno
            Tires are cheap clutches...

            Comment


            • #7
              Alrighty! Sounds like a plan. I got the pump out earlier today thanks to your advice, and am now somewhat stuck at a single step. I'm working on getting the right side (rear) pushrods out, but the valve cover has a tricky bolt, located right behind a coil pack mounting stud. I can't seem to get anything angled in there to get it out. Are there any suggestions here? I couldn't get a picture of the offending location, however I did grab a few of the current state.
              Click image for larger version

Name:	0106111425.jpg
Views:	1
Size:	582.3 KB
ID:	376482
              Click image for larger version

Name:	0106111426.jpg
Views:	1
Size:	558.5 KB
ID:	376483
              Click image for larger version

Name:	0106111426a.jpg
Views:	1
Size:	587.0 KB
ID:	376484
              Last edited by Delystus; 01-06-2011, 05:15 PM. Reason: Pictures Grouped

              Comment


              • #8
                The coil pack mounting stud should be able to be removed somewhat easily...
                -Brad-
                89 Mustang : Future 60V6 Power
                sigpic
                Follow the build -> http://www.3x00swap.com/index.php?page=mustang-blog

                Comment


                • #9
                  I didn't see any means of removing it while I was back there. Have any idea how to do so? I don't know many techniques out there, so I find myself stuck quite easily.

                  Comment


                  • #10
                    If I remember correctly, it's got an inverted torx head on the end of it before you get to the threads that hold the coil pack down. Basically at the very end of it. You should be able to use a small box end 12 point wrench on it. I've used box end 12 points on inverted torx bolts before, but you won't catch me doing it on anything that has a good deal of torque applied to it or important bolts like bearing caps. If you don't have a wrench that will work, grab it below the stand off for the coil pack bracket with a set of vice grips. It's smooth there and boogering up that surface won't hurt anything.
                    -60v6's 2nd Jon M.
                    91 Black Lumina Z34-5 speed
                    92 Black Lumina Z34 5 speed (getting there, slowly... follow the progress here)
                    94 Red Ford Ranger 2WD-5 speed
                    Originally posted by Jay Leno
                    Tires are cheap clutches...

                    Comment


                    • #11
                      Alright, then I should hopefully have the project done tomorrow, aside from one little thing (two, actually). The heater hoses that connect to the intake plenum were so old that they were extremely stretchy and completely stuck on. I had to cut them to get them off, does anyone know the size of this hose? I forgot to take note, and I can't find any information about it, and I believe I will have to order the hose sections from NAPA.

                      Comment


                      • #12
                        So I attempted to remove the stud yesterday, but that failed. I used a T8 socket, which after flexing the stud a fair amount, slipped and rounded the head clean off of the stud. Being out of options, I bent the stud out of my way so I could get to that last bolt on the valve cover, just to find out...the head on that bolt was rounded off too. Out of options, I proceeded to break off the valve cover, and am going to be taking a few trips to some junkyards tomorrow to find a replacement cover, as I missed my opportunity to get to a dealership today. Simple jobs turn awry because of awkward engineering! Since I'm thinking about it...does anyone have a suggestion for a good product to de-carbon the EGR passages?

                        Comment


                        • #13
                          Sea foam. I normally just spray some carb spray and pick at it though. That sucks about the valve cover bolt. Personally I would go to the junkyard before a dealership anyways. Much cheaper. I would probably get one from a W body (GP, Lumina, Monte, ect.) because they have decent sized engine bays making it easier to get to the rear valve cover.
                          -60v6's 2nd Jon M.
                          91 Black Lumina Z34-5 speed
                          92 Black Lumina Z34 5 speed (getting there, slowly... follow the progress here)
                          94 Red Ford Ranger 2WD-5 speed
                          Originally posted by Jay Leno
                          Tires are cheap clutches...

                          Comment


                          • #14
                            Some advice from a new guy.
                            I just went thru this on my Cutlass . You didnt mention it but I think you should put a new oil pump drive seal in while the intake is off and I was told to change the oil after my intake swap before starting the engine. And while the oil was almost done draining to dump one or two quarts of clean oil in to flush whatever antifreeze out of the pan that might have dripped into the pan.

                            my $0.02

                            Comment


                            • #15
                              Thanks for the feedback! Unfortunately, I've already completed the job. It gave me many more issues than I had foreseen, but the car runs great now! And apart from some minor wiring aesthetics and a few missing and mis-matched bolts, it came together nicely. I did do an oil change, as that's the major concern of a blown LIM gasket. The Fel-Pro gaskets were of much higher quality than the OEM, and stayed in place nicely during reassembly. The biggest problem out of all that I ran into during this job however were the bypass hoses that connect to the intake plenum. They're barely on there as it is, with no clamps of any kind. Tomorrow I'm going to attempt to install some screw clamps, and hope the hoses don't pop off. Did nobody think of a fitting-type installation during engineering this? .__.

                              Comment

                              Working...
                              X