Announcement

Collapse
No announcement yet.

What are the chances of Cracked Heads?

Collapse
X
 
  • Filter
  • Time
  • Show
Clear All
new posts

  • #16
    On a side note: Do all of the Fel-Pro Head Gasket kits now include the improved metal LIM gaskets? I had heard they did but would like to make sure...

    What should the going rate be for the mill? I have a local guy who is generally pretty cheap but I don't trust him 100%...

    Comment


    • #17
      Originally posted by robertisaar View Post
      IIRC it's the last cylinder to recieve coolant, so it should run the hottest...
      Weird. Number 2 was the one with the blown gasket so it should have been one of the coolest. Thanks for the tips guys, I think I will eyeball these myself and hopefully tilt the odds of this getting done right the first time in my favor.

      Comment


      • #18
        No, they offer both plastic and metal LIM gaskets with the head set. I only list the metal set on wot-tech.com
        Ben
        60DegreeV6.com
        WOT-Tech.com

        Comment


        • #19
          I was just browsing the store.... there are an awful lot of things on there I could use now and in the future...

          Comment


          • #20
            Or send them here... I pay $80 for a set of v6 heads to be cleaned, pressure checked, checked for warpage and milling all in one go... Elkhart is a lot smaller than St. Louis, have you called around at all?
            -60v6's 2nd Jon M.
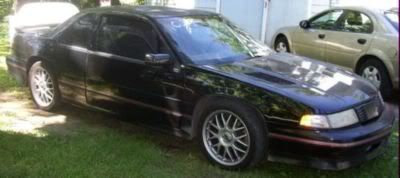
            91 Black Lumina Z34-5 speed
            92 Black Lumina Z34 5 speed (getting there, slowly... follow the progress here)
            94 Red Ford Ranger 2WD-5 speed
            Originally posted by Jay Leno
            Tires are cheap clutches...

            Comment


            • #21
              If the shop has not done so or suggested this for Aluminum heads ... perhaps using dye testing would reveal any weaknesses. It is not too expensive for a lay person to purchase and try and can be very revealing of cracks and flaws in the castings...especially in the areas between the valves where the metal concentration thins out and receives such a pounding action from the actions of the valves opening and closing:

              Which is the better way to check a head? Carl W. French Alfred, Maine Southern Maine LBC welfare shelter 67B will be in our will 73BGT Daily driver 72 Triumph Bonneville Many more that change often

              Comment


              • #22
                for the cost of milling and pressure testing, you could get 2 of these.

                1999 Grand Am SC/T - 301HP, 365TQ - ARP Rod Bolts, ARP Oil Pan Bolts, ARP Head Studs, Mild Cam, 3500 Heads w/28696 Springs, Ported 3500 LIM & 3400 UIM, GT32R @ 12PSI, Rebuilt Trans, 42.5 Injectors, Racetronix Fuel Pump, TCE Adjustable FPR, SC/T Kit, SC/T Spoiler, Shaved Trunk, WOT-Tech Coil Overs, Solid Rear Laterals w/Poly Bushings, Control Arms w/Poly Bushings, Poly Engine & Trans Mounts, Front & Rear Strut Braces

                Comment


                • #23
                  Originally posted by pocket-rocket View Post
                  Or send them here... I pay $80 for a set of v6 heads to be cleaned, pressure checked, checked for warpage and milling all in one go... Elkhart is a lot smaller than St. Louis, have you called around at all?
                  I did call around and that seems to be the going rate here! I have another set that I might need work on so expect to see a PM from me, one of these days.

                  I did see those heads (and some for $99 with all the work done) on eBay. When it comes to this kind of work, I feel better if I can physically touch the guy who does the work. The people you can touch seem more inclined to back their work if there is a problem

                  I got the heads back yesterday. They look pretty nice. I have a buddy coming over tonight with a dye kit to look for cracks. The owner of the shop said he took a look at them and they seemed OK to him with no obvious visible cracks.

                  I guess my last question to the crowd is this: What sealant should I use on the LIM, head bolts, and intake bolts?

                  I currently have some RTV Black on hand as well as some Permatex thread SEALER, some Permatex LocTite, and whatever it is that will come in the LIM kit. The head bolts is what I am most interested in since it is suggested that I wait a bit (30 min) after I torque the bolts, re-torque them, wait again, then do the +90 degrees to get the best crush. I don't want the sealant to harden during the waiting period....

                  Comment


                  • #24
                    the LIM bolts need thread locker to keep them from backing out. Silicone the valley under the lower. Do not put sealant anywhere else. Do not torque and retorque and then add 90 degrees to the head bolts. Do it by the torque specs and leave it alone.
                    Ben
                    60DegreeV6.com
                    WOT-Tech.com

                    Comment


                    • #25
                      The Fel-Pro head bolt set (new) that I just purchased said to apply sealer to the head bolt threads. It just didn't say what kind. I do know the bolts go into the water jacket...

                      The torque and wait instructions I ran across seemed a bit hokey but "plausible" as a method of getting a more accurate "crush" on the gaskets. I will stick with the torque and turn method in the Fel-Pro instructions as you suggest.

                      I am assuming it doesn't matter if I use blue or red threadlocker on the LIM bolts.

                      Comment


                      • #26
                        Well... I attempted the dye test last night. I could not conclusively locate any cracks. The test uses a penetrant and a developer. The penetrant is supposed to soak into any pores or cracks then gets wiped off the surface with a clean cloth and solvent. The developer (similar to a spray can of white-out) is sprayed over the surface and if/when it comes in contact with the penetrant it turns pink. The trouble is the number of grooves and crevices in the heads. With the valves installed, pockets of the penetrant stay everywhere and contaminate the results. The only method to remove the excess (spray solvent since you can't get a rag in there) removes the pentrant as well.

                        Anyway, I ended up with one spark plug hole that kept giving me a partial crack indication between the hole and the intake. There is NOTHING visible when the area is cleaned. It only extends a short distance from the spark plug hole and stops well before the valve seat. It could be the start of a crack or just a deep pore in the metal that keeps holding the penetrant. Also, the pentrant by nature "creeps" along casting lines. It could be creeping up out of the spark plug threads which are saturated with penetrant with no way of cleaning. I am fairly certain this is a false reading but I plan on cleaning and testing at least one more time before I install this head. Hopefully I will get the plug hole clean enough to eliminate it a a source of the reading...

                        I recommend to anyone who is thinking about using a chemical test like this to not do it. At least don't do it with the valves installed. There are far too many variables to make this an accurate test in my case. What I thought would give me piece of mind has actually instilled doubt while proving NOTHING conclusively either way.
                        Last edited by mongo; 02-04-2010, 12:06 PM.

                        Comment


                        • #27
                          I finally found a good tutorial for using my dye kit that should give me the answer. Looks like I need a little more drying time on the dye and developer. In case anyone is curious about the process:


                          My readings did not show any real "crack" like in the tutorial, just hazy pink areas which is why I am thinking it is the dye creeping. I will perform the test again with more diligence later this afternoon.

                          Comment


                          • #28
                            It's cracked. I retested with the dye and ended up at the same spark plug hole again. The crack is invisible to the naked eye but consistently shows up with the dye.... barely. The crack extends from the spark plug hole to the intake valve seat. I pulled the valve and the crack does not extend to the bowl. I cannot see into the water jacket in that spot.

                            Now... what should be my safest and cheapest solution? Grab one off eBay that is supposedly cleaned, milled, tested and ready to use for $99? Have the crack fixed? Have it tested and see if it even leaks?

                            I would add pics but you can't see the crack without the dye and you can barely see it with the dye. I am pretty sure I couldn't take a pic where it would be visible.

                            Comment


                            • #29
                              Is it 100 plus core charge? If its 100 outright, that isn't bad.
                              Ben
                              60DegreeV6.com
                              WOT-Tech.com

                              Comment


                              • #30
                                Have the head pressure checked. If it passes then use it. It's not unusual to find partial cracks in aluminum heads and still have the head usable.
                                Your local OBDII moderator

                                2000 Grand Am GT w/ WOT parts

                                Comment

                                Working...
                                X