Announcement

Collapse
No announcement yet.

How to R&R an F-Body 3.4L V6 via the Bottom

Collapse
X
 
  • Filter
  • Time
  • Show
Clear All
new posts

  • How to R&R an F-Body 3.4L V6 via the Bottom

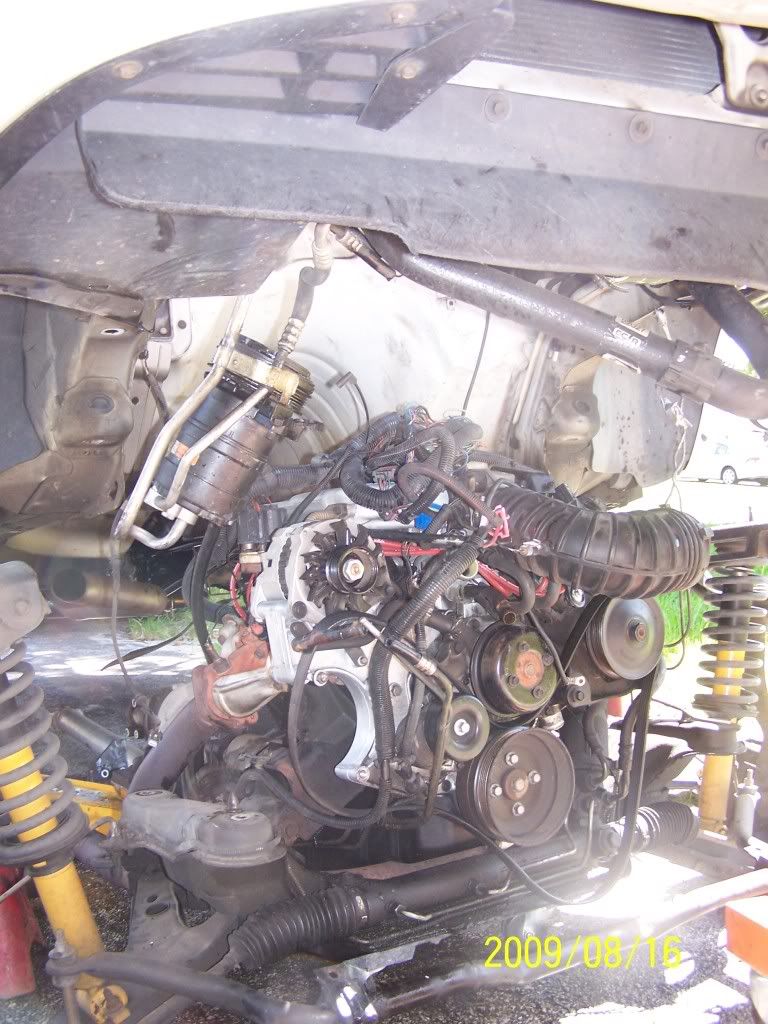
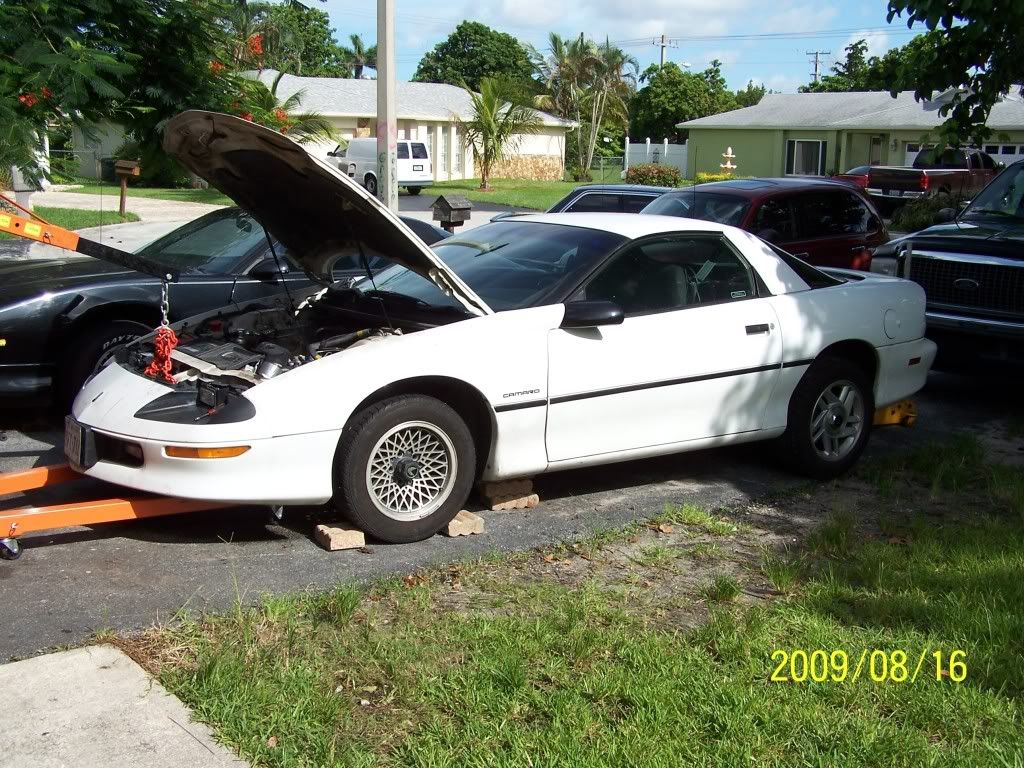
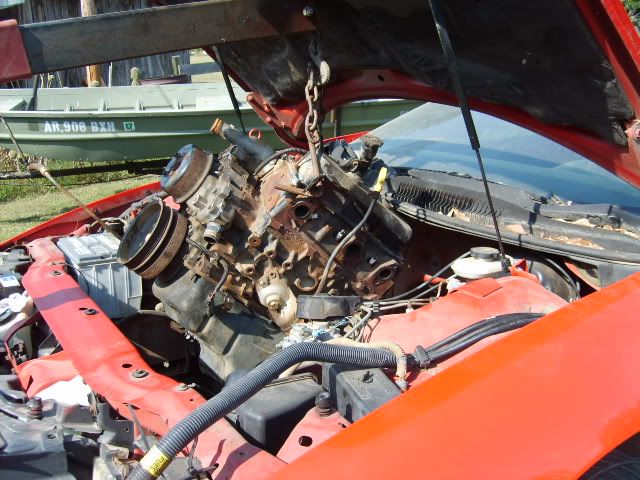
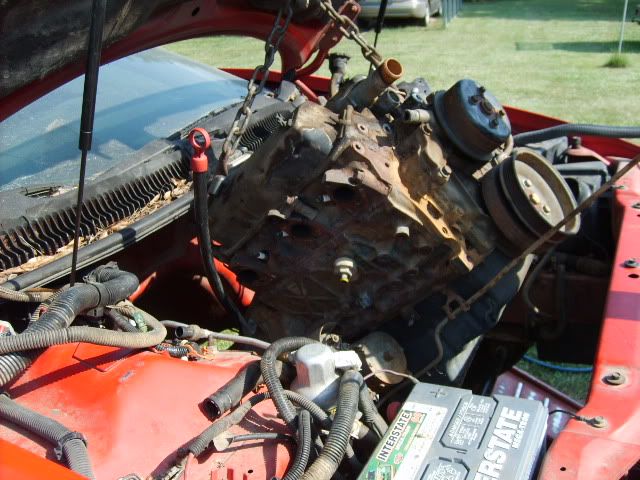
    Okay...The time has finally come for me to remove the old 3.4L L-32 V-6 Engine from my Son's Black 1994 Camaro. After the ebb and flow in my thinking on which would be the best way to accomplish this task... I've decided to follow the GM Factory Method and after constructing some supporting apparatus and doing a safety dry-run on how this can safely be done, I'll drop the K-Frame member with the Engine and Transmission as one entire unit and then split the cases and R&R the old engine with the latest rebuilt one. This should make so much of the work, such as the installation of the headers/Y-Pipe, that much easier.

    Now those of you that have followed my original posts know enough about me by now to realize that I try to a be thoughtful, careful and on occasion... an imaginative mechanic, so it would come as no surprise that I might find my inspiration for doing this type of removal from others who have proven the task can be done without killing anyone...such as this fellow's approach:


    ...and of course...ordinarily... I would have to agree with you. But in this case... seeing THIS video is what finally helped to push me over to the other side as to which technique to use...and yes... Archimedes would have jumped out of his bathwater to run and see these boys in action(Eureka!) LOL:


    To be honest with you...the thought did cross my mind to gather together a happy crew of homespun crackers like these Yo-Yos...but I got stumped at the part about "How to Find the Right Sized 'Bubba' for your Engine Removal Project". I read all the "WIKIs" on the subject... but I couldn't decide on whether I should hire the man "By the Hour"...or "By the Pound"...for the job. And my only other question would be...Will the Last Guy on this Daisy Chain of a Hoist Rig be buying "Tattoo" a Box of Candy and some Flowers before the night is over?!

    Seriously though, this approach to getting this difficult "mid-engine" car design of a motor pulled and then putting in a new one takes on a whole new set of problems when you suddenly have to lift the entire car off of the drive train.

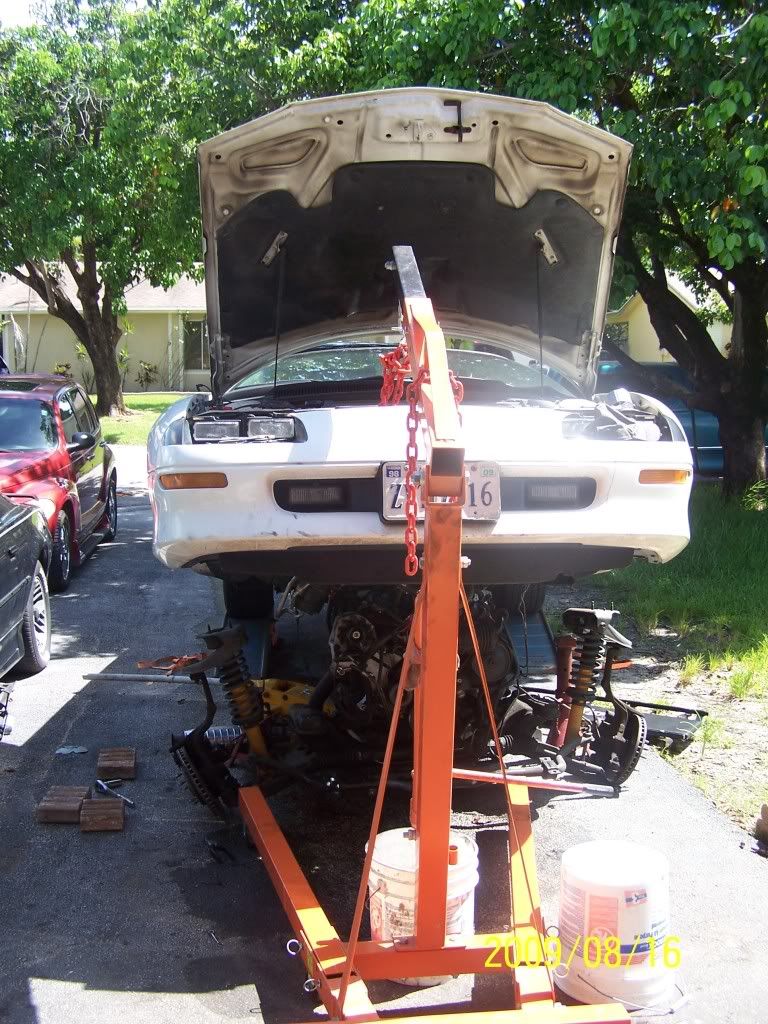
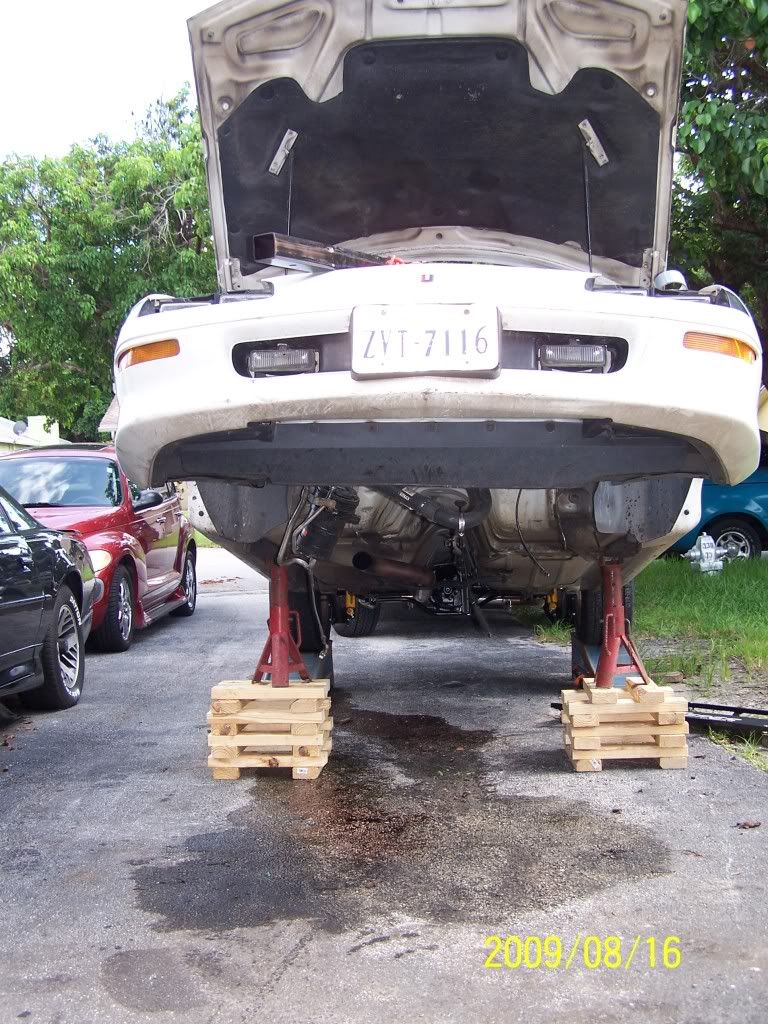
    Without getting too deep into what the Renaissance folks called "The Golden Ratio" ...when it comes to constructing anything that your life depends upon to work correctly... knowing a little about "Base to Height" Ratios will keep you from building something to elevate and support the car that just might collapse like a House of Cards ...with you underneath the damned thing. Ergo... my photos will show you some modifications in construction that I insisted upon making when using the originator's idea on how to build his "Jack-Stand Elevators". The bottom and tops of both wooden support towers will be 3 X 2" X 6"X 16" fitted boards that are plumb and square with the box design (16" X 16" X 11 Segments) and screwed and nailed together, rather than just being nailed in place. To "Top it Off" ...my Jack Stands will rest on two Cast Iron Brake Disks to better distribute the weight of the car ( around 3392 lbs with the V-6 and 3436 lbs with a V-8 Engine). The idea here is not to allow all that weight being vectored into the four steel uprights to cut into or wind up splitting the wood cross members; breaking through and collapsing the car as soon as the failure occurs. I hope no one will disagree with my abundance of caution on this matter.

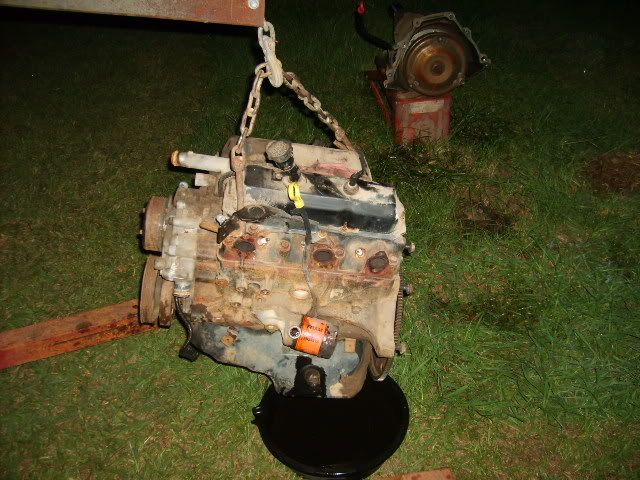
    Tommorow... I'll be picking up a section of thick, plate steel (an old welding table) that I will cut with an Acetylene Torch down into a rectangular segment narrow enough to fit inside the splayed legs of my Cherry Picker-Engine Hoist. I have a Very Heavy Duty set of roll-around wheels to install on all four corners and this will serve as the means to lower and capture the Engine/Xnsmission Combo and wheel it out from under the car. Afterward... I'll remove the Jack Stands from the two "Towers" and adjust the two wooden platforms enough to lower the car down and have it resting safely so I can dress up the engine well and get things ready for the new motor. As always... I'll be methodical and careful and document these activities with digital images and videos and share what happens on my Photo Bucket Site for all to see. Here are the beginnings of the work to be done on this project:

    Store your photos and videos online with secure storage from Photobucket. Available on iOS, Android and desktop. Securely backup your memories and sign up today!
    Last edited by 60dgrzbelow0; 11-22-2009, 09:05 PM.

  • #2
    that video made me hope it fell on one of their arms or something. thats just plain stupid. why on earth wouldnt you just weld the legs on to the forward part of the jack, make them longer... put wheels on em (or not) and then you dont need 3 people to stand on lengths of shit all tied together with C clamps and shit... and what exactly does an iron worker do? because those welds looked like shit. i can do better than that! i like the underneath idea.

    My Cardomain Page | My Random Online Gallery<- (Now Fixed)

    Comment


    • #3
      You might want to try something like I did with my W-Body. The engine is turned 90* but, the concept should be the same. I was able to jack the car up onto truck/tall jackstands on the front and regular jackstands on the rear and NEVER have to raise or lower the car again until done. The magic came in the form of a Sears ATV jack. Drilled a couple of holes in the "pads" of the ATV jack and screwed on a couple of pieces of 2x4. The cradle rested solidly on the 2x4s and I was able to lower everything down and roll it right out from under the car and wherever else it needed to go. When out from under it made a REAL nice, stable work platform, you could lower the 2x4s onto regular jackstands. I might add that I had NO help,,, at ALL!! Not bad for an old one legged man,,, ayyy? Here's a link to the thread for my engine/trans swap.. You can see the ATV jack in just about every picture....

      If you need any more details,, holler!!!
      Tom....

      Comment


      • #4
        holy shit! and i paid someone to do my swap! lol wtf

        My Cardomain Page | My Random Online Gallery<- (Now Fixed)

        Comment


        • #5
          It's not that hard to do in the driveway. I did Paul's removal before I got the lift and shop.

          Step 1:
          Remove the wiring harness from behind the passenger side sill and kick panel. Unplug and feed it through the firewall. The A/C lines are intertwined with the harness, so you will have to unplug a few sensors to get the harness unwrapped.

          Step 2:
          Remove driveshaft making sure you mark the differential as to position.

          Step 3:
          Unbolt transmission crossmember and torque arm mount.

          Step 4:
          Raise the vehicle just high enough to get a dolly of some sort under the oil pan (I use a furniture dolly with the 4 casters).

          Step 5:
          Disconnect the transmission cooling lines, wires and any linkage (if auto)

          Step 6:
          Unbolt the 6 k-member bolts while using an engine hoist to keep the drivetrain from falling too fast onto the furniture dolly.

          Step 7:
          After lowering the engine on to the dolly, make sure all wires etc are clear.

          Step 8:
          Disconnect the brake lines at the ABS distribution block.

          Step 9:
          Disconnect the steering shaft.

          Step 10:
          Using the engine hoist on the radiator support, start lifting the car off the drivetrain.

          Step 11:
          Make some kind of jack stand extensions, I used 2x4's stacked like railroad ties.

          Step 12:
          Roll the engine and transmission out to a place you can work on it, and lower the car back down to a safe position.

          Pics:


          Links:
          WOT-Tech.com
          FaceBook
          Instagram

          Comment


          • #6
            damn, silly me pulled it out the old way by myself.


            87 3.4 4x4 blazer
            3 inch body lift, t-bar/shackle lift, 31x10.5s

            Comment


            • #7
              Originally posted by neo71665 View Post
              damn, silly me pulled it out the old way by myself.
              Did you leave the rad. in? I rather pull than drop it. Seems safer.
              Lifting my front wheels, one jack at a time.

              Comment


              • #8
                ATV JACK...

                Originally posted by walterdude View Post
                You might want to try something like I did with my W-Body. The engine is turned 90* but, the concept should be the same. I was able to jack the car up onto truck/tall jackstands on the front and regular jackstands on the rear and NEVER have to raise or lower the car again until done. The magic came in the form of a Sears ATV jack. Drilled a couple of holes in the "pads" of the ATV jack and screwed on a couple of pieces of 2x4. The cradle rested solidly on the 2x4s and I was able to lower everything down and roll it right out from under the car and wherever else it needed to go. When out from under it made a REAL nice, stable work platform, you could lower the 2x4s onto regular jackstands. I might add that I had NO help,,, at ALL!! Not bad for an old one legged man,,, ayyy? Here's a link to the thread for my engine/trans swap.. You can see the ATV jack in just about every picture....

                If you need any more details,, holler!!!
                Tom....

                Tom... Excellent photos of your set up and as it happens...only yesterday I was lamenting to my neighbor how tough this job would be if I had to try and support the transmission without the aid of a Jack designed expressly for the purpose. Lo and Behold...he showed up early in the day with what he called a "Motor Cycle Jack" (its and ATV Jack) with a long "T" Bar handle. It look just like the one you used (prior to the two-by mods). So between what you have shared and what John (Forced Firebird) has explained below...I'm sure to come up with the best of both solutions!

                Oh... and just so you know...in a Fire Fight... My money is one the OLM (One Legged Man)... the reasons being is that he never bothers to even think about the option of trying to run away...and that certain knowledge steadies his mind...and his aim, too . Thanks a lot, Tom.
                Attached Files
                Last edited by 60dgrzbelow0; 12-04-2009, 02:41 PM.

                Comment


                • #9
                  From John- "Forced Fireird":

                  It's not that hard to do in the driveway. I did Paul's removal before I got the lift and shop.

                  Step 1:
                  Remove the wiring harness from behind the passenger side sill and kick panel. Unplug and feed it through the firewall. The A/C lines are intertwined with the harness, so you will have to unplug a few sensors to get the harness unwrapped.


                  Step 2:
                  Remove driveshaft making sure you mark the differential as to position.

                  Step 3:
                  Unbolt transmission crossmember and torque arm mount.

                  Step 4:
                  Raise the vehicle just high enough to get a dolly of some sort under the oil pan (I use a furniture dolly with the 4 casters).

                  Step 5:
                  Disconnect the transmission cooling lines, wires and any linkage (if auto)

                  Step 6:
                  Unbolt the 6 k-member bolts while using an engine hoist to keep the drivetrain from falling too fast onto the furniture dolly.

                  Step 7:
                  After lowering the engine on to the dolly, make sure all wires etc are clear.

                  Step 8:
                  Disconnect the brake lines at the ABS distribution block.

                  Step 9:
                  Disconnect the steering shaft.

                  Step 10:
                  Using the engine hoist on the radiator support, start lifting the car off the drivetrain.

                  Step 11:
                  Make some kind of jack stand extensions, I used 2x4's stacked like railroad ties.

                  Step 12:
                  Roll the engine and transmission out to a place you can work on it, and lower the car back down to a safe position.

                  John- Those images and Step-By-Step Instructions are just EXACTLY what I need to know! Thanks! My only other question (other than the several hundred others pertaining to what to watch out for when splitting off the Engine from the Tranny and anything else that needs attention in any special way when removing the Old Motor and installing the New One) has to do with Item #1 on your list; I'm having some trouble trying to visualize "The Kick Panel" arrangement and whether or not I have to worry about the "Yellow Wire" Air Bag Harness to prevent accidentally setting it off on the passenger side. Have you got any "snaps" handy that show how the harness and attachments look down there? I am very glad to get this kind of advice, Gentlemen!!!
                  Last edited by 60dgrzbelow0; 11-23-2009, 02:45 AM.

                  Comment


                  • #10
                    Originally posted by 1988GTU View Post
                    Did you leave the rad. in? I rather pull than drop it. Seems safer.

                    Nope I pulled the rad, took the top manifold off, and left the tranny attached when I done it. Its still on in those pics but I took the hood off also. I had the front of the car sitting on ramps until I had the engine/tranny tilted enough to start coming out then took them out. Jacked the engine on up and rolled the car back.

                    I took my time cause the car wasn't mine (just the engine and tranny) and had it out in about 3 hours total working alone with air tools. work a bit, drink a few beers, work some more. It was about 100 degrees out that day and I was stuck dead in the sun burning up. I've always heard it was easier to do them from the bottom but with it not being my car I didn't wanna risk snapping a bolt off or screwing up something I would have to fix.
                    Last edited by neo71665; 11-23-2009, 04:25 AM.
                    87 3.4 4x4 blazer
                    3 inch body lift, t-bar/shackle lift, 31x10.5s

                    Comment


                    • #11
                      Jenga Anyone?


                      BTW that tubular sub frame looks nice
                      Shane "RedZMonte"
                      2004 Corvette Z06 Commemorative Edition -VIRGIN
                      1995 Monte Carlo Z34 14.38@101mph, 331hp/355tq
                      -Turbonetics T04E Super 60 Turbo, 2.5" Borla Catback, OBDII, 42.5# Injectors
                      2004 Subaru WRX STI -Lightly Modded (SOLD)
                      1994 Lumina Z34 -VIRGIN (SOLD)
                      1992 Lumina Z34-VIRGIN (RIP)
                      1992 L67 Lumina Z34 (SOLD)
                      1990 Turbo Grand Prix (SOLD)

                      Comment


                      • #12
                        I wanna pull that middle one on the pass side.
                        Lifting my front wheels, one jack at a time.

                        Comment


                        • #13
                          Never Take Anyone's Word that &quot;It's safe...&quot;

                          Originally posted by RedZMonte View Post
                          Jenga Anyone? BTW... that tubular sub-frame looks nice

                          My point... exactly... You'll never see Bobby crawling around under a car sitting at an angle like a Canadian Harp Missile... ready to fall on me and crush me like f*cking June Bug on a Windshield. Early in my career as police detective, assigned to the Auto Theft squad... a very good friend of mine was doing what we called a "Salvage Inspection" on a suspected stolen vehicle at a Salvage Yard that had a Dymo-Taped VIN plate in the corner of the windscreen. It was customary that a volunteer NATB Investigator (back in the early 1980s it was known as ..The National Auto Theft Bureau... but now it has another name) was with our team of detectives helping to determine what the actual VIN was from some secret VIN stamped on the sub-frame under the car that he knew about as part of his "Tricks of the Trade" from years of experience in identifying altered, stolen cars.

                          As he was laying on the ground under the car...poking around with his flashlight and some sand paper to revive the number from a hidden, rusted cross member, the intrepid wrecker driver took his concentration off of the precarious way he had lifted up the car ..."Just long enough for him to do the check". When the slippery metal contacts slid free, with no safety chains attached to prevent the two vehicles from separating, the stolen vehicle suddenly lunged back enough to drop off the Tow Truck Lift. Without one scintilla of warning, the car fell about two and half feet on the man working underneath. Sadly...tragically... my friend and colleague, Investigator Gordon Schaeffer... was instantly killed.

                          So it is from this experience... and many others like it that I had to investigate as a homicide detective later in my career that my abundance of caution stems from. So if you ever see me get under a car to do anything that requires trusting the methods and equipment that will prevent me or anyone else from death or grievous injury... the things done ahead of time to prevent this possibility will be of my own design and implementation. Never take another person's word that the car you are getting under is "Safe" until you check and determine this to be true... yourself!

                          Comment


                          • #14
                            Originally posted by neo71665 View Post
                            I've always heard it was easier to do them from the bottom but with it not being my car I didn't wanna risk snapping a bolt off or screwing up something I would have to fix.
                            shoulda wentat night time with some hand tools and shit, you coulda got that motor for free!!

                            My Cardomain Page | My Random Online Gallery<- (Now Fixed)

                            Comment


                            • #15
                              Bob. I didn't go crawling under the car like that! lol. It was needed to be picked up that high to pull the motor out from under the wheel wells, and with the drivetrain on wheels, the engine hoist was in the way of pulling it out the easiest way - the front. If I had more lateral room, the hoist would have stayed attached and pulled it out the side, but had the ForcedFirebird on one side and the lawn to deal with on the other
                              Links:
                              WOT-Tech.com
                              FaceBook
                              Instagram

                              Comment

                              Working...
                              X