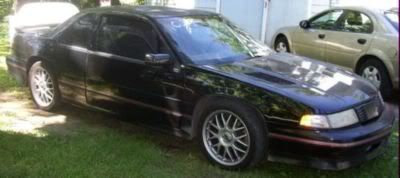
Can someone give me directions how to change this other than dropping the engine down...?
Announcement
Collapse
No announcement yet.
Have to change alternator on 95 MonteCarlo Z34
Collapse
X
-
Jack up the right side. Pull the wheel, pull the axle. Make sure the battery is disconnected BEFORE you disconnect the alternator. Remove belt, remove alternator. Damn, that sure sounds simple when I write it, but I've never done it without some choice language during the physical part of the exercise . . . .LOL.
If you ain't rock and roll, you must be driving a Honda
-
Drink 3-4 beers before you start, that'll soften the initial shock.
Comment
-
The most frustrating part of the actual alternator removal/install is the bolt around the backside of the housing that is totally blind. You have to feel to get the bolt started in the threaded boss in the block. An impact gun on the axle nut and a long large bar to force down the control arm (disconnect ball joint) so as to swing the strut out of the way for clearance are a blessing.91 LQ1 GP GT
Comment
-
I haven't looked, but I may need to fix the images on that one as well...-Brad-
89 Mustang : Future 60V6 Power
sigpic
Follow the build -> http://www.3x00swap.com/index.php?page=mustang-blog
Comment
-
This pic just about sums it up... Take your time, its a Pain in the ass.... you may feel suisidal after attempting this job...
Shane "RedZMonte"
2004 Corvette Z06 Commemorative Edition -VIRGIN
1995 Monte Carlo Z34 14.38@101mph, 331hp/355tq
-Turbonetics T04E Super 60 Turbo, 2.5" Borla Catback, OBDII, 42.5# Injectors
2004 Subaru WRX STI -Lightly Modded (SOLD)
1994 Lumina Z34 -VIRGIN (SOLD)
1992 Lumina Z34-VIRGIN (RIP)
1992 L67 Lumina Z34 (SOLD)
1990 Turbo Grand Prix (SOLD)
Comment
-
No no no no noooooooo. . . . that's the problem, man. What I meant by "choice language" is that you have to use the mechanics mantra to coax the machine into submission. It goes like this . . . I love my machines, my machines love me and I serve the machine masters, and if this piece of shit doesn't cooperate soon I'm gonna serve the machine masters up a healthy dose of BFH alignment tool #1!


If you ain't rock and roll, you must be driving a Honda
Comment
-
Lol! I remember that day like it was yesterday. That's an Autozone alternator for you. Just look how clean it is still. That's why I went with a Delco that I still have yet to have go out, and that pic was from around '99 or '00...Originally posted by RedZMonte View PostThis pic just about sums it up... Take your time, its a Pain in the ass.... you may feel suisidal after attempting this job...
-60v6's 2nd Jon M.
91 Black Lumina Z34-5 speed
92 Black Lumina Z34 5 speed (getting there, slowly... follow the progress here)
94 Red Ford Ranger 2WD-5 speed
Originally posted by Jay LenoTires are cheap clutches...
Comment
-
Lol yeah, use a Delphi or ACDelco replacement... (Pillatium sp? i hear are ok too) But checker brand SUCK!
SShane "RedZMonte"
2004 Corvette Z06 Commemorative Edition -VIRGIN
1995 Monte Carlo Z34 14.38@101mph, 331hp/355tq
-Turbonetics T04E Super 60 Turbo, 2.5" Borla Catback, OBDII, 42.5# Injectors
2004 Subaru WRX STI -Lightly Modded (SOLD)
1994 Lumina Z34 -VIRGIN (SOLD)
1992 Lumina Z34-VIRGIN (RIP)
1992 L67 Lumina Z34 (SOLD)
1990 Turbo Grand Prix (SOLD)
Comment
-
What I wonder is why iv been doing so well. I don't run the cooling duct on the alt or right splash guard or ps rack heat shield or ps cooling pipe cradle lope. I haven't had any problems. But then again I do have giant hole in my hood for ventilation.Last edited by Dave96z34; 06-09-2010, 05:36 PM.
96 Z34 3.4 SC DOHC Getrag, 284 5sd manual transmission, stage 3spec clutch, 97 engine, 97 pcm, S3 intercooler 1 of 1 Roots SC LQ1 in the world 8.5 psi.
Comment
-
I don't know if the 95 is different than the 97 but that year calls for loosening the pinch bolt connecting the steering column to the rack, then lowering the cradle no more than 4 inches to give clearance to access the back of the alternator to connect the battery cable, wiring harness air vent pipe. I've done it without lowering the rack by attaching the battery cable before bolting the alternator to the bracket. But you can't attach the harness plug and vent pipe without it being in the bracket since they won't reach. So you have to bolt it up then apply a lot of patience and a long screwdriver to maneuver the harness plug and vent pipe into position.
Comment


Comment